- Secure order
- Easy return shipment
- Service-Hotline +31 20 809 5778
Instructions No. 3373
Difficulty: Beginner
Working time: 1 hour
Do you have a small child and are looking for a creative activity? Sew your own bib - practical and stylish at the same time! In these instructions, we'll show you how to make a magical bib from a guest towel using simple materials that you may already have at home. It will be big enough to catch even the wildest food fights, while at the same time providing your table with a pretty accessory. So, grab your needle and thread and let's get started! 

Step 1 - Mark out and cut out
Grab your guest towel. If you want to sew your own bib, you can also cut out your fabric, e.g. terrycloth, measuring approx. 30 x 50 cm, and sew around it.
Start by marking the center of one short side of the towel. From this point, draw a vertical line downwards, about 10 cm long. This can be adjusted to suit your needs. Under this line, draw a circle with a diameter of 10 to 12 cm. Use a stencil or a round object that you have to hand, such as a bowl or a roll of ribbon. Now cut along the line and cut out the circle. 

Step 2 - Attach the bias tape
Now it gets a little challenging, but don't worry, it's all doable with good preparation! Unfold the bias tape in the middle and place it around the cut edge of the towel. Make sure that the ribbon is firmly in place to ensure that you cover all layers of fabric when sewing. Secure everything with the "Wonder Clips" or pins at short intervals. Sew the bias tape along the edge using a straight stitch, working slowly and adjusting the fit of the bias tape if necessary. If you notice that not all layers are sewn together, simply re-sew in the affected areas. 

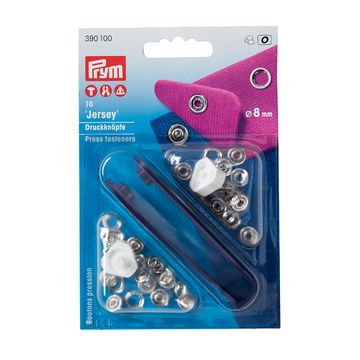
Step 3 - Attach the snaps


Step 4 - Iron on the appliqués


If you liked these instructions and need the materials, visit our online store. There you'll find everything you need to get started!