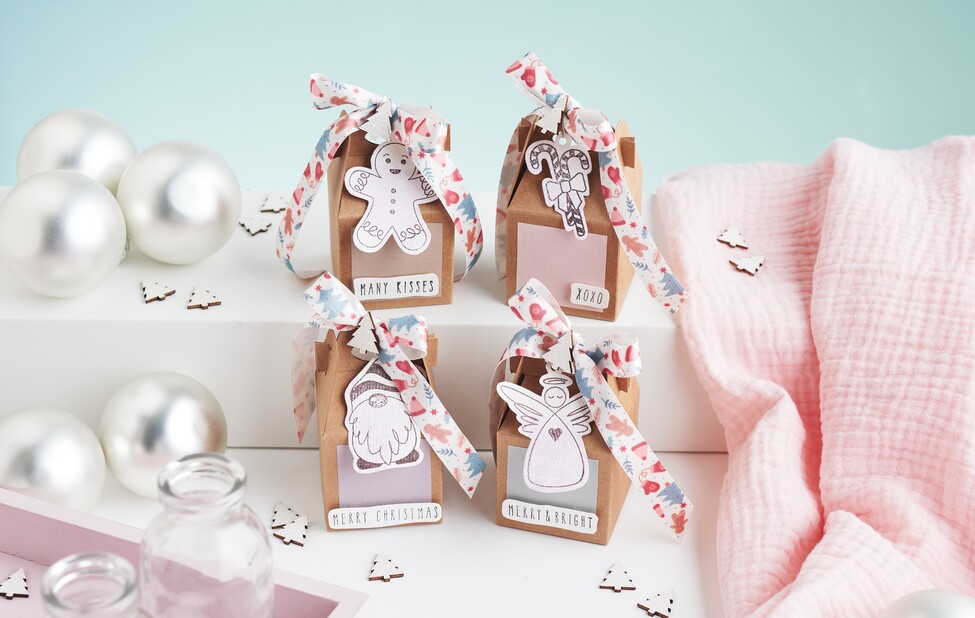
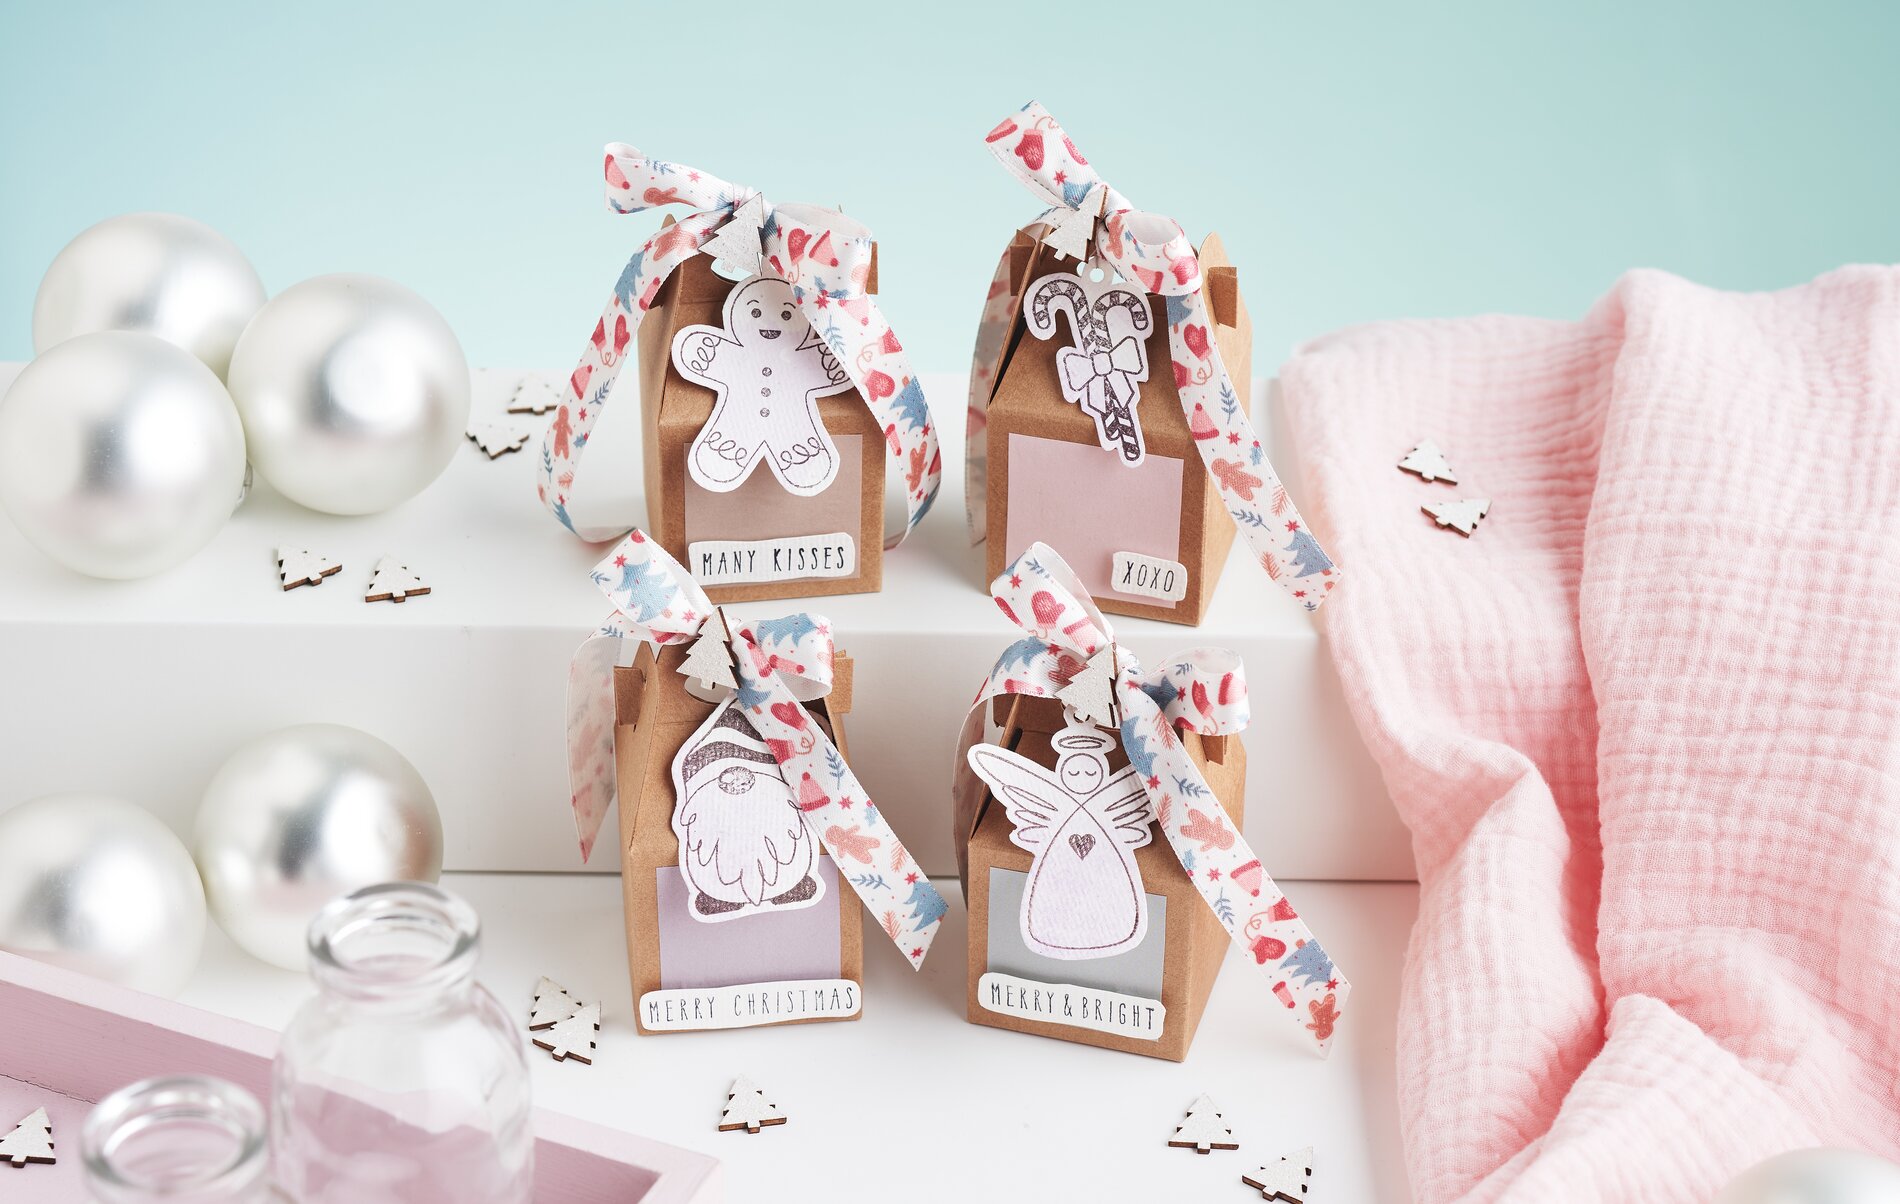
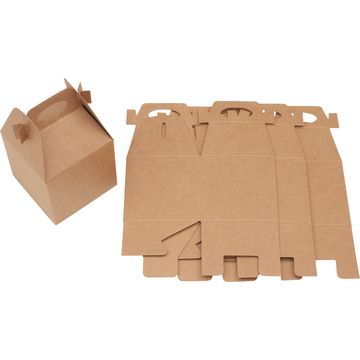
Fold, fill and close the boxes Take the prepared box templates and fold them carefully along the lines provided. Make sure that all edges are folded straight so that the box is stable at the end. Fill the boxes with small gifts or sweets as desired and close them securely.
Cut the folding paper to size and stick it on Cut your folding paper into 4 x 4 cm squares. It is best to use a ruler and a sharp cutter-knife or scissors to get precise edges. Glue the cut folding papers to the front and back of the boxes to give them a decorative look.
handicraft paint dilute and paint watercolour paper Dilute your handicraft paint with a little water until it reaches a slightly liquid consistency. Then use a soft brush to paint the watercolour paper in the color of your choice. Let your creativity run wild - whether in one color or with color gradients, anything is possible.
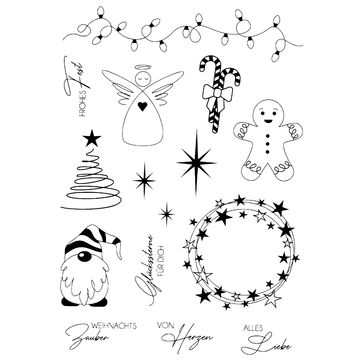
watercolour paper stamping As soon as the paint has dried, stamp the watercolour paper with your favorite colors Clear Stamps. Press the stamps firmly onto the Paper, to create clearly defined patterns and motifs.
Punch a hole for the suspension
Now punch a hole in the stamped watercolour paper, through which the yarn will later be pulled for hanging. Make sure that the hole is not too close to the edge so that the Paper does not tear.
Draw and cut out the edge Use a pencil to draw a narrow border around the stamped motifs and then cut them out carefully. These frames create a nice outline around your design and set it off beautifully.
Attach messages with 3D pads Write or stamp messages on the watercolour paper. as well, then stick them to the box using 3D pads. These pads give the lettering a great 3D effect and make it stand out visually. A particularly great idea is to use the box as a personalized placeholder. To do this, write the names of your guests on the watercolour paper and attach them as described. This way, each guest has their own placeholder, which is also a lovely memento
Attach motifs to the handle with yarn Attach the cut-out motifs to the handle of the gift box using twine.
Tie a bow and attach the scatter piece Finally, tie a bow around the handle of the box and attach a sprinkle to the center of the bow using hot glue. These small details round off the overall look of your gift box perfectly.
Now you're ready to make your own gift box! Visit our online store and find all the materials you need for your creative craft project. Let's go - your personalized gift box is waiting for you!
Have fun crafting!