- Secure order
- Easy return shipment
- Service-Hotline +31 20 809 5778
Instructions No. 3209
Difficulty: Beginner
Working time: 2 Hours

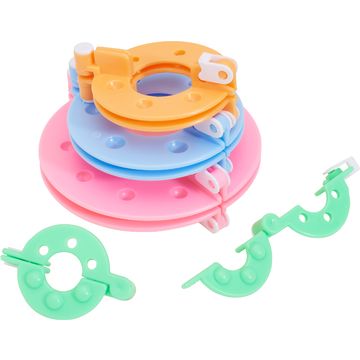
To start your pompom project, use the two small pompon maker from the set. Each pompon maker consists of two parts that are clicked together. This gives you two semicircles that are connected to each other and that you can fold or unfold as you wish. Wrap your desired wool around one half of the template, starting from the center of the template. Then repeat this with the other half of the template. Then close the two halves of the stencil back together to form a ring. Cut the wrapped wool along the outside of the template. Pull a ribbon between the two pompom halves and tie them firmly together. The pompom maker can now be opened. Remove the finished pompom and cut it into shape with scissors.
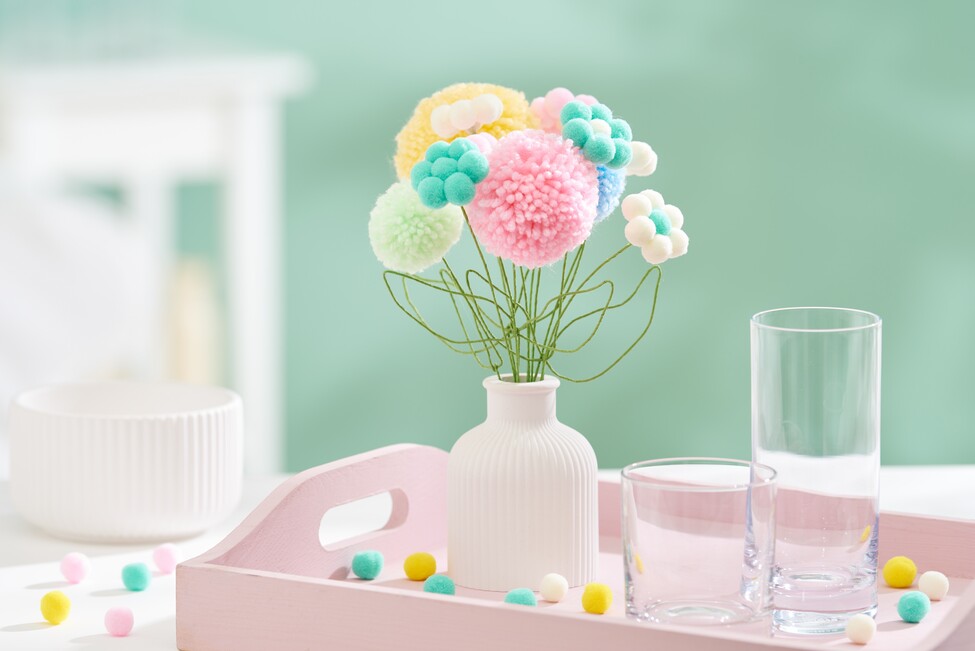
Now it's time to get creative: glue the finished pompoms together to create the perfect flower shape. You can experiment with different sizes and colors to create an individual look. To create the flower stem, attach florist's wire to the underside of the pompom flower. Apply a dot of hot glue to the area where the wire is to be attached to ensure a secure hold. For extra stability, you can apply some more glue around the wire. The next step is to shape the flower stem. Use pliers to shape the wire into decorative leaves by carefully bending it and giving it the desired shape. This will give your pompom flowers a realistic look.
When the pompom flowers are ready, it's time to prepare the vase. Pour the vase material according to the enclosed package instructions. After about two hours, you can carefully unmold the vase and allow it to air dry completely to ensure its stability.
Finally, arrange the homemade pompom flowers in the finished vase. Place them wherever you like to give your room an individual and cheerful decorative accent.