- Secure order
- Easy return shipment
- Service-Hotline +31 20 809 5778
Instructions No. 3433
Difficulty: Beginner
Working time: 8 Hours

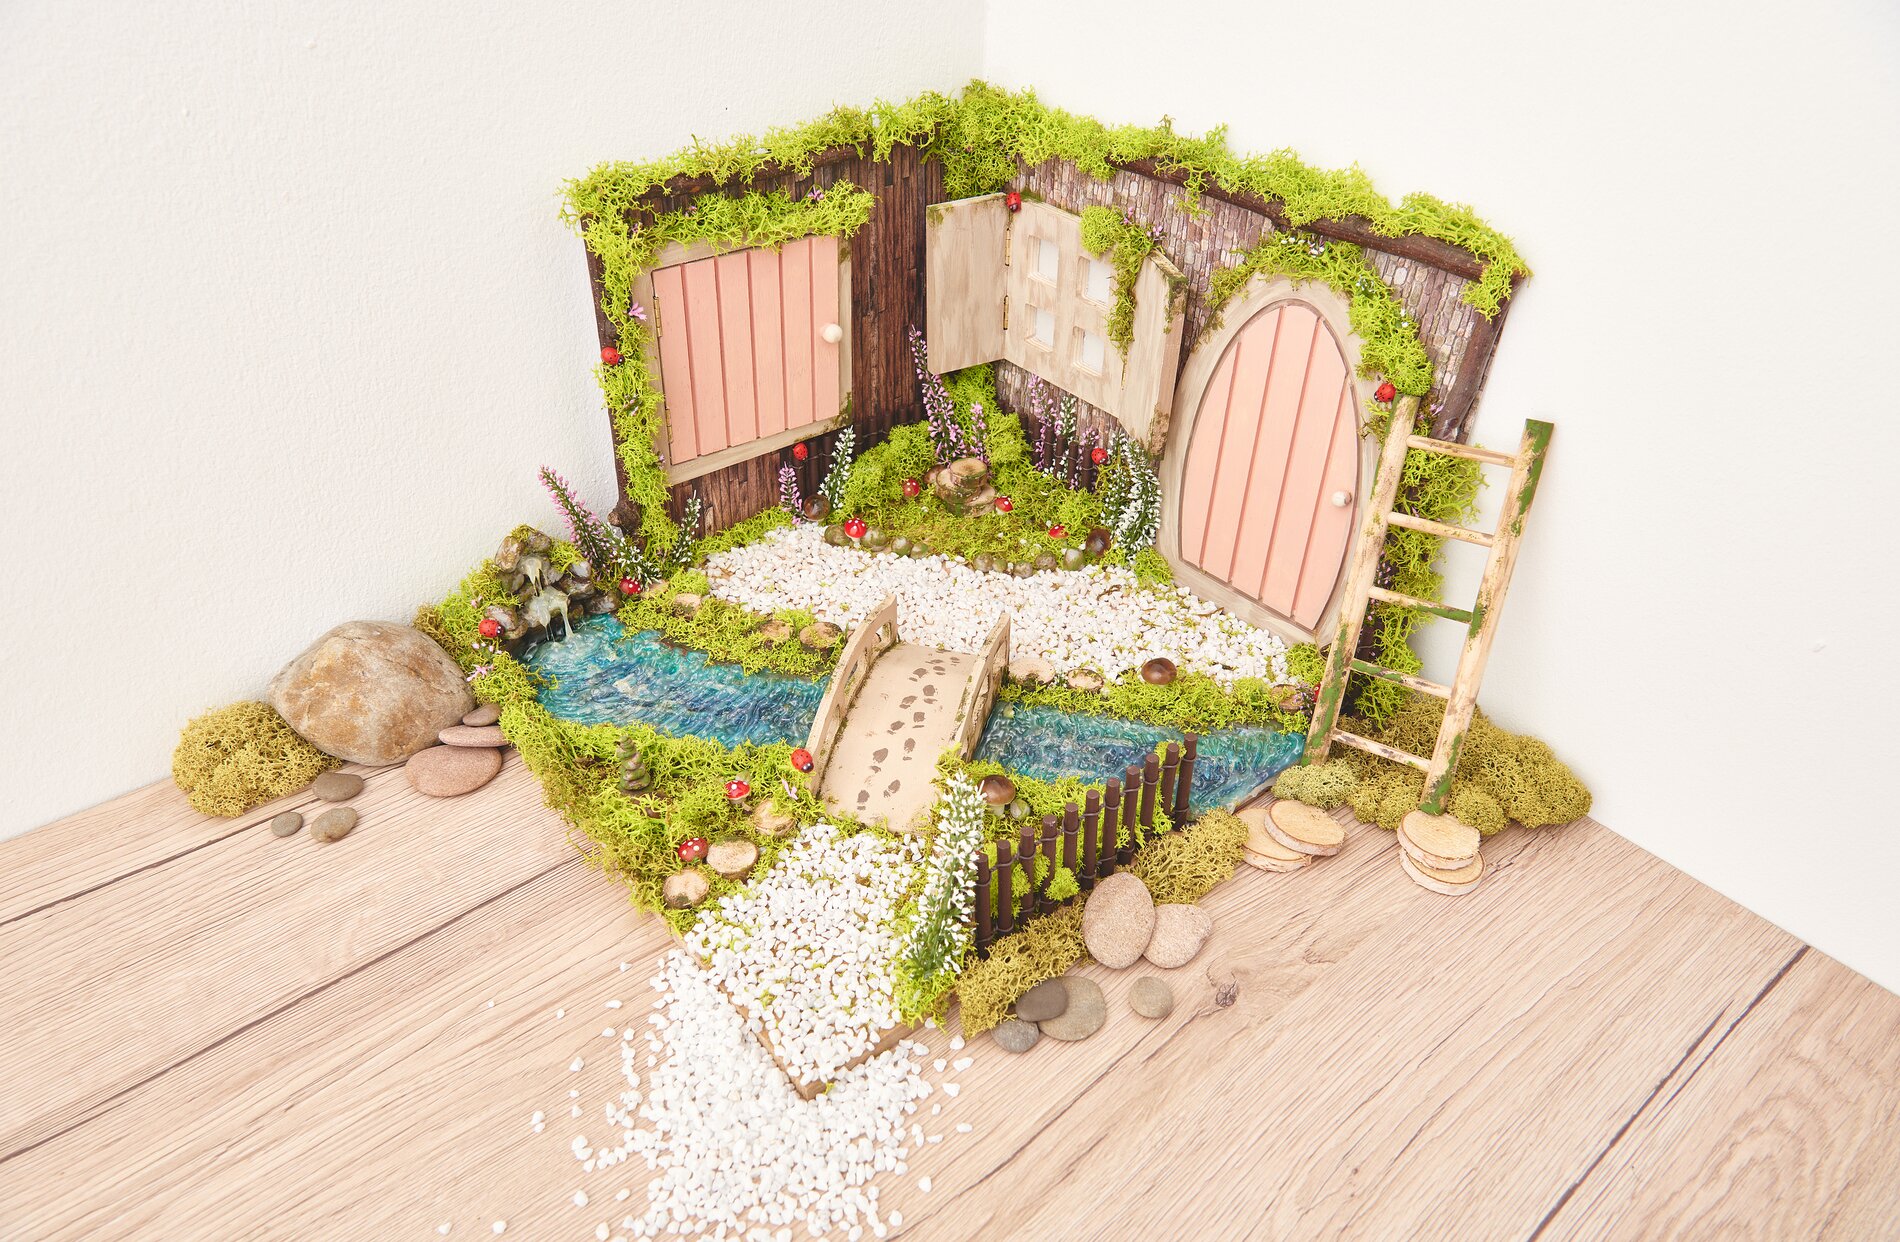
Step 1: Build the base plate
Start by gluing the craft blocks together to form a stable plate. Make sure that the blocks are firmly connected to each other to create a stable base for your project.
Step 2: Cover the outer structure
Take the printed Paper and glue it around the outside of the blocks using handicraft glue . This not only gives your base only an attractive design, but also provides additional stability.
Step 3: Reinforce the edges
Decorate the edges of the board with birch branches. These not only only provide a rustic charm, but also strengthen the structure of your diorama.
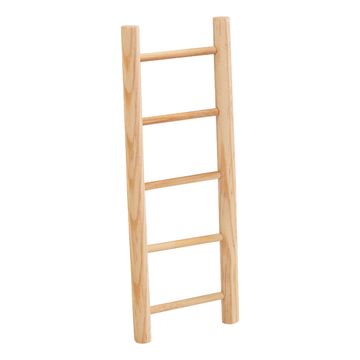
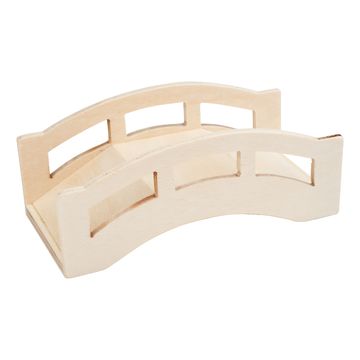
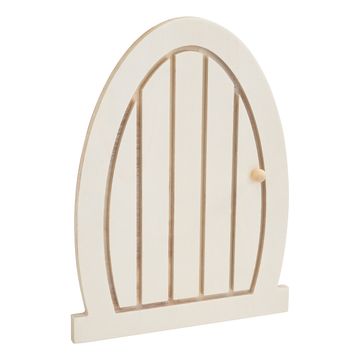
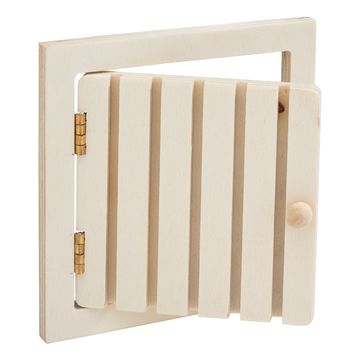
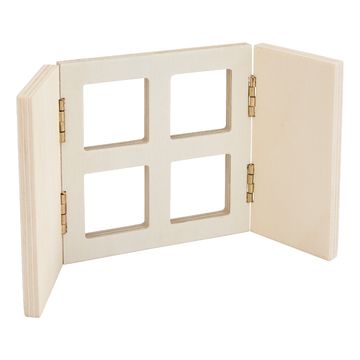
Step 4: Paint and attach details
Paint doors, windows, ladders, bridges and skylights with VBS handicraft paint and then attach them to the base with glue. These details give your diorama life and personality.
Step 5: Design the windows
To make the diorama more realistic, you can cut out the Paper behind the windows and replace them with vellum paper . This will make the windows look more authentic and give your diorama a beautiful light.
Step 6: Place the fence
Glue the fence along your panel to border your miniature world. This gives your creations a frame and enhances the visual impression.
Step 7: Mark the landscape
Place the bridge on the plate and use a pencil to mark the positions for the river and the path. This will help you keep your bearings during the rest of the crafting process.
Step 8: Fixing the pebbles
Spread the handicraft glue generously with a brush on the plate where you want your path to run and attach the pebbles. The adhesive will hold the stones in place and fix them permanently.
Step 9: Design the river
Also apply handicraft glue along the intended river line. Then separate the layers of napkins and crumple them up slightly to create irregular river edges. Coat everything with glue and leave to dry thoroughly.
Step 10: Paint the river
Once the glue has dried, paint the river with the VBS handicraft paintto give it a lively color and texture.
Step 11: Finalize and embellish
Add the finishing touches to your scene by adding moss, cut heather, mushrooms, wooden discs and small ladybugs. These details will liven up your miniature world and make it appear realistic.
Step 12: Create and place the stones
Shape stones from polymer clay and harden them in the oven at approx. 110 degrees Celsius for 30 minutes. Attach the stones with hot glue as desired to form a small waterfall and place more stones in the landscape beds.
Step 13: Add water effects
Create wavy strips of hot glue along the river to add dimension. Also apply the glue generously to the stone-waterfall to simulate a dynamic water feature.