- Secure order
- Easy return shipment
- Service-Hotline +31 20 809 5778
Instructions No. 3512
Difficulty: Beginner
Working time: 30 Minutes


Step 1: Pour and prepare numbers
Start by mixing the casting powder with water. To do this, take 2 heaped tablespoons of casting powder and mix with water to a creamy consistency. Pour this mixture into the molds of numbers from 1 to 4. A little tip: tap gently against the mold to remove any trapped air bubbles and distribute the casting compound evenly. Leave to dry for about 30 minutes. Once the mixture is firm, carefully remove the numbers from the molds. If the edges are uneven, smooth them out with sandpaper, so that they look perfect on your wreath.
Step 2: Design the wooden tray
While the numbers are drying, paint the wooden tray with craft paints of your choice. Use a paint sponge, to dab silver accents onto the tray and the cast numbers . These shimmering highlights will give your wreath an elegant touch.
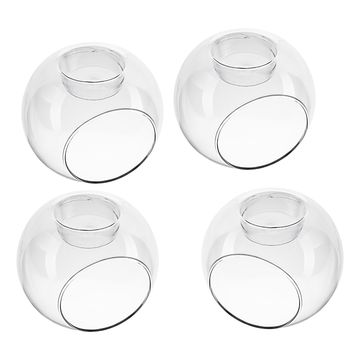
Step 3: Engrave the tealight balls
Now it's time to get creative: charge up your engraving machine and punch out stars using the craft punch . Use a foil pen to draw the star patterns on your glass tealight balls. Don't worry if you don't like the patterns - the foil pen can be easily wiped off. Place the stylus cylinder in your engraving pen and slowly trace the lines you have drawn without applying pressure while running the engraver on the highest setting. After engraving, rinse the glasses to remove any residue from the foil pen.
Step 4: Assemble the wreath
Glue 3-D glue pads. to the base of the cast numbers Remove the protective layer and place the numbers securely in the engraved glasses. To give your wreath the final shine, sprinkle some diamond-snow on the tray and place the glasses on top. Finally, add the tea lights - and your handmade Advent wreath will shine in all its glory!
Ready to start your creative Advent project? Visit our online store to get all the materials you need for your unique Advent wreath with engraved tealight balls. Unleash your creativity and make this Advent season something very special!