Motif transfer
Print out the motif with a laser printer. If you choose a motif other than our crab, please make sure that you print the motif or lettering mirror-inverted.
For the punch needle technique are particularly well Linen- suited as well as monk fabrics. For our crab we have
chosen monk fabric. Lay it out on a table. Take your printed motif and place it with the right side on the fabric. Now you can see the white backside in front of you. Fix it Paper with adhesive tape on the fabric.
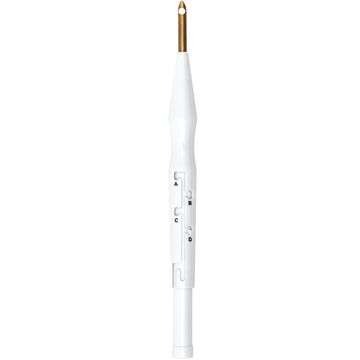
Now take the
transfer Markerto hand. Shake the transfer Marker and pump until the tip is moistened. Go with the Marker over her with Paper the motive. Then rub with your fingers or with the help of a wooden stick over the motif so that it is transferred well onto the fabric. Now pull the printout.
Another way to get the motif on the fabric is to use this with
Graphite Paper to transfer. To do this, place the carbonless copy paper on the fabric, place the motif over it (not mirror-inverted with this technique) and trace the motif with a pencil.
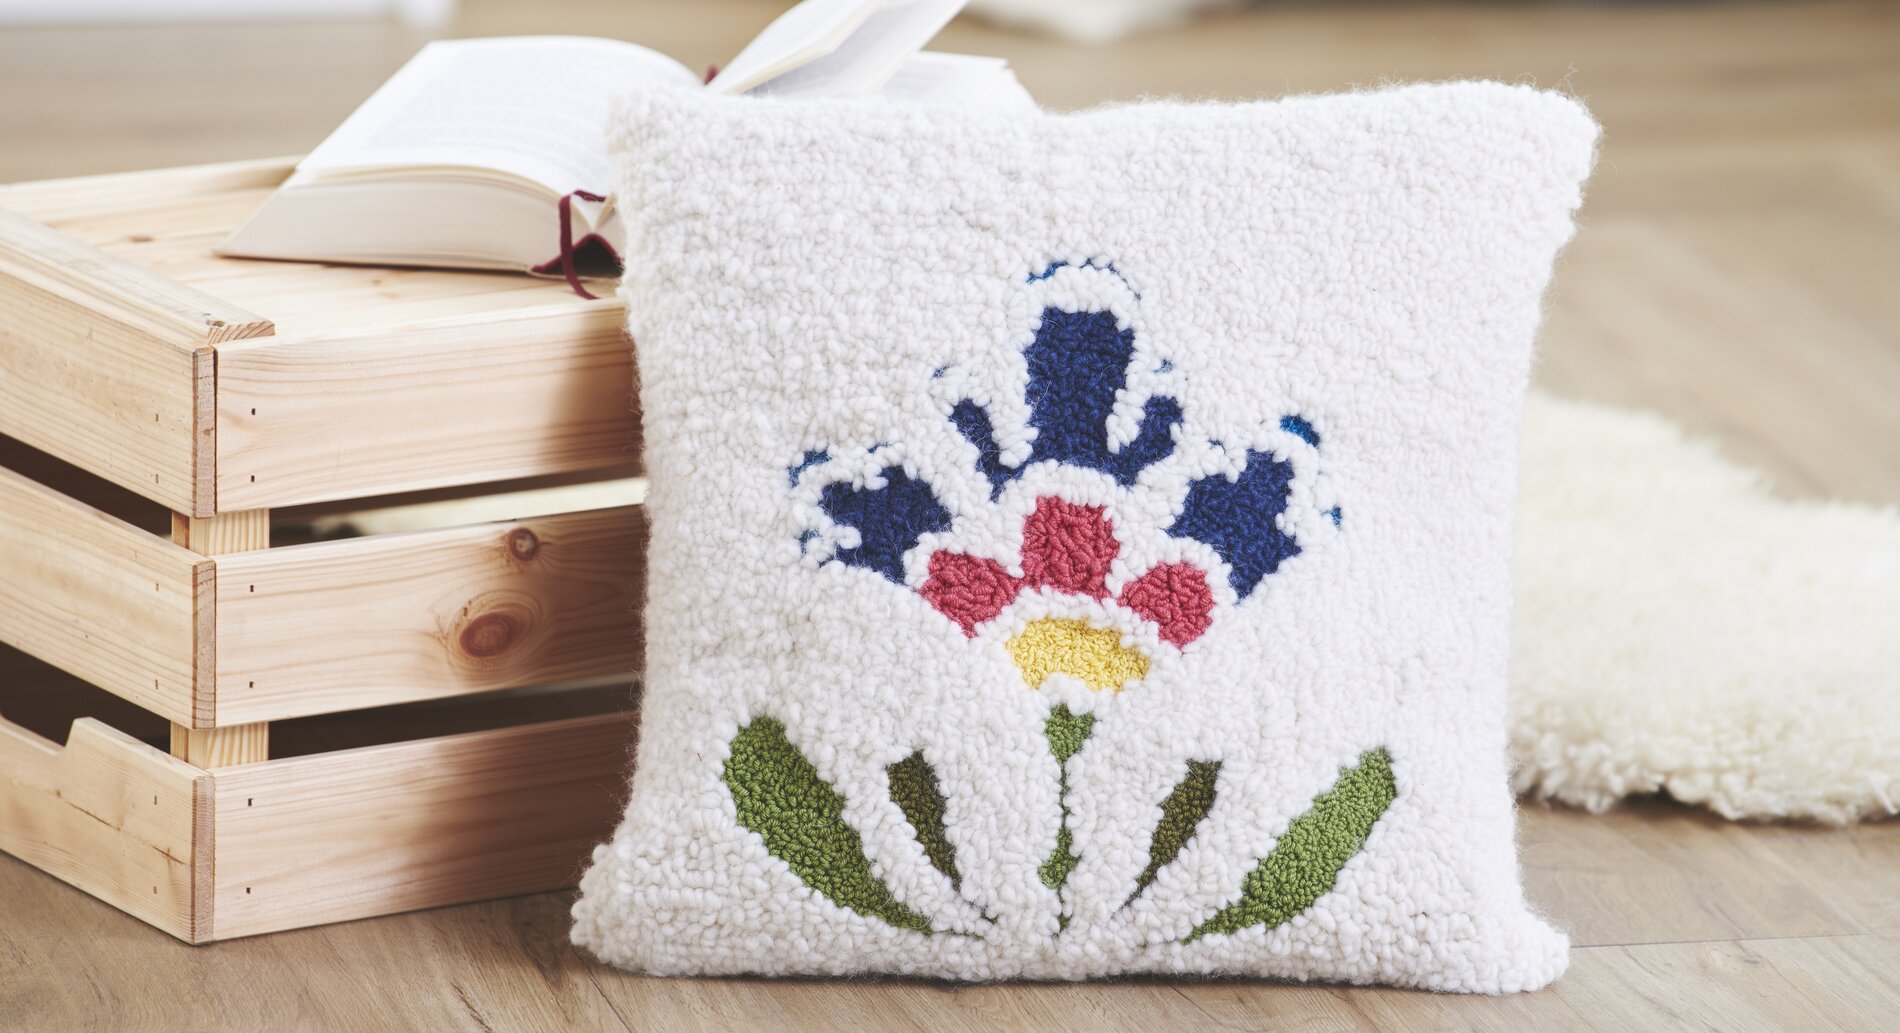
Punch Needle - Painting with needle and thread
Before you start punching, it is best to stretch your fabric into a
Embroidery hoop. This makes working with the
Punch Neddle much easier.
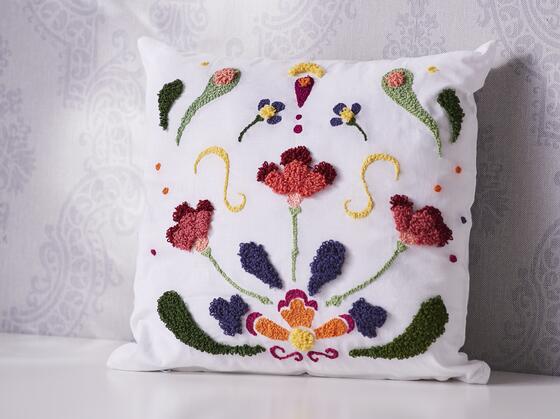
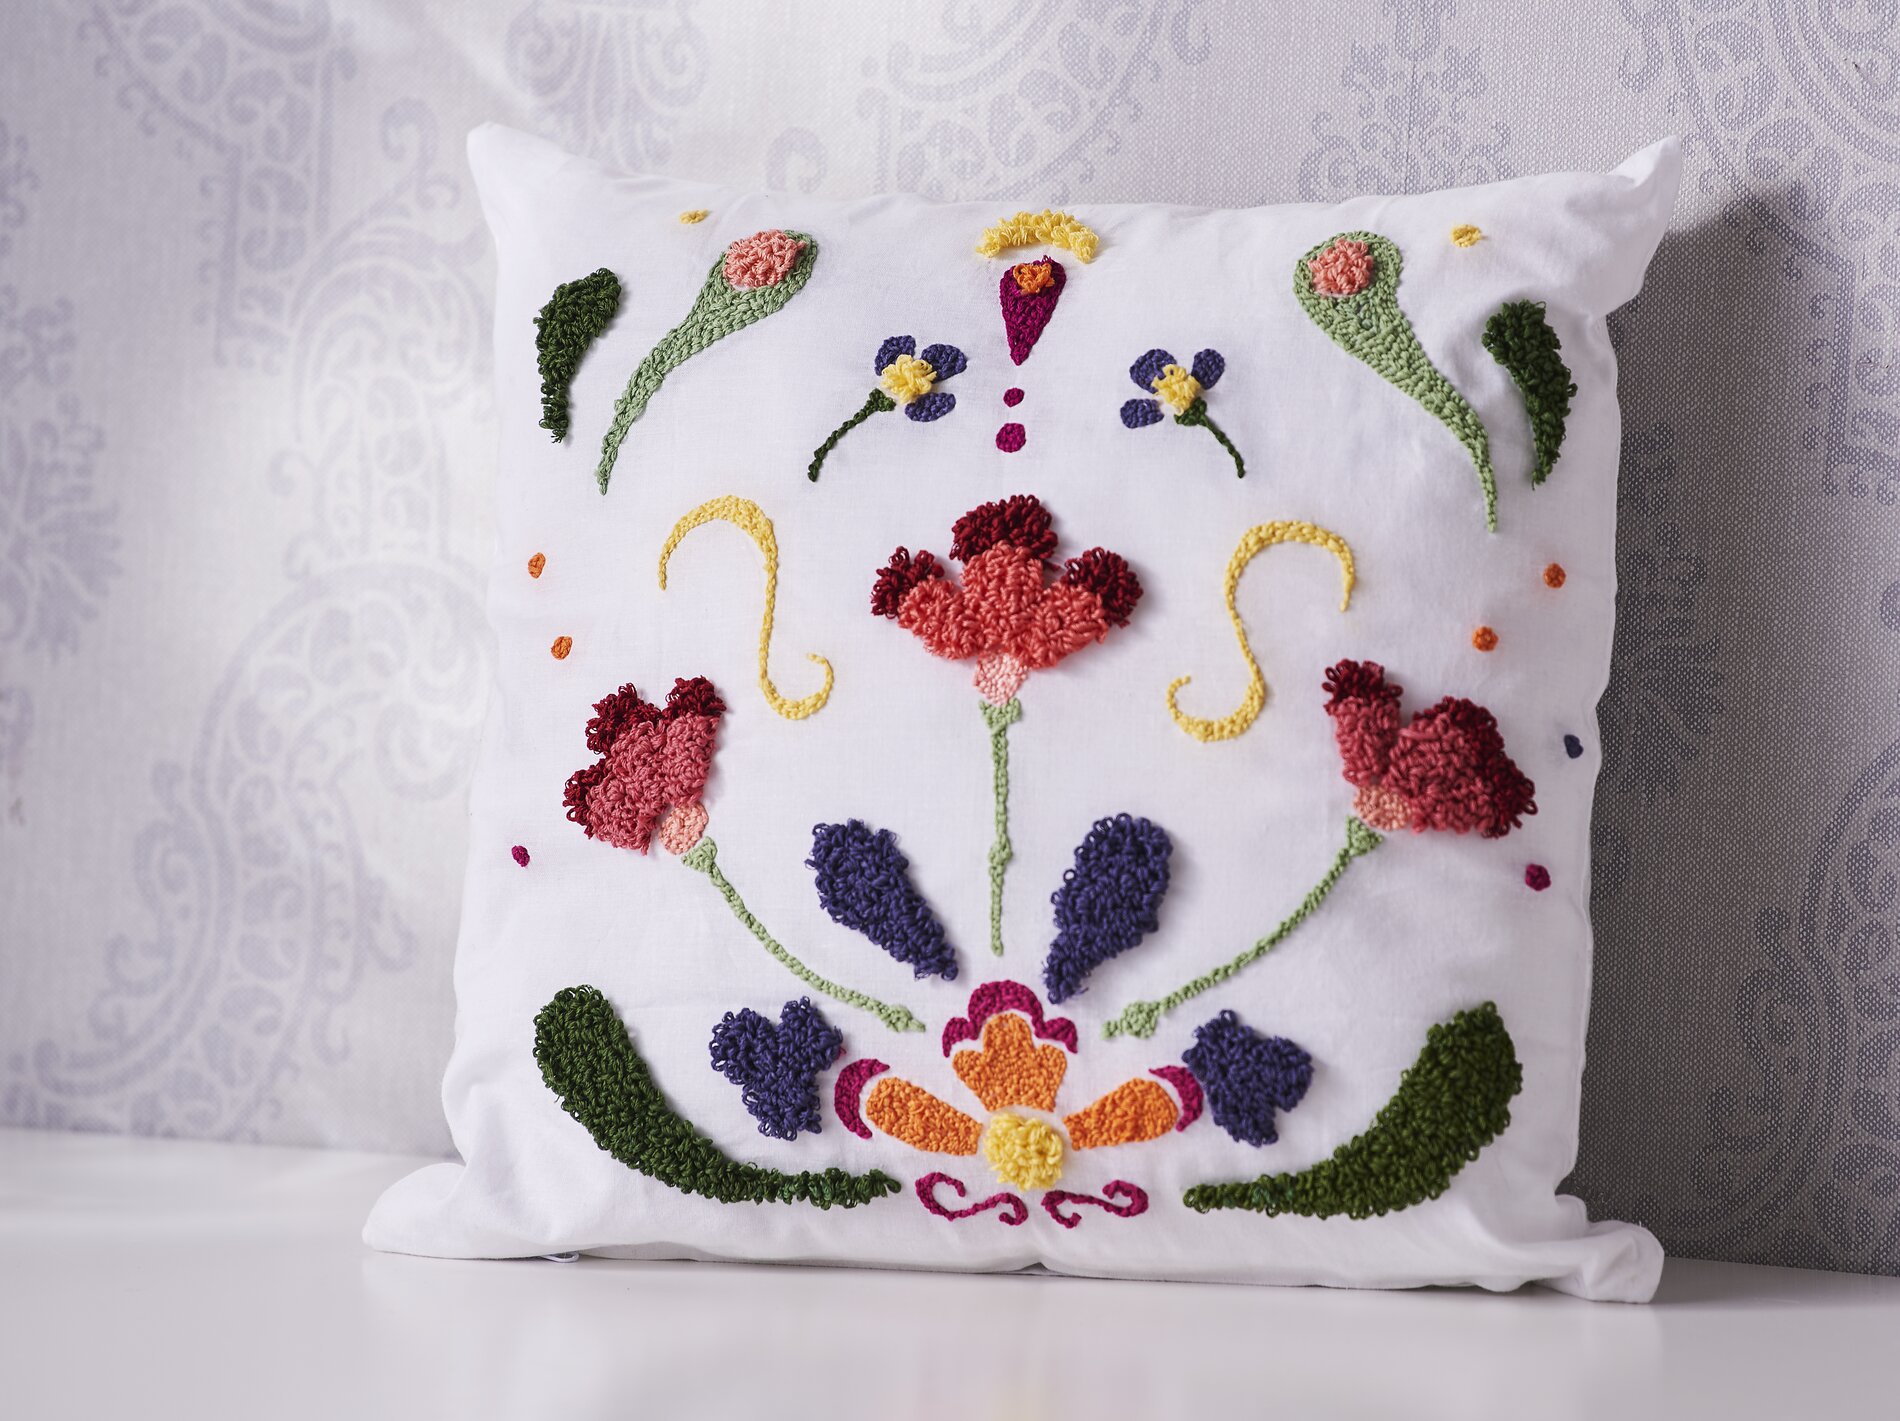
In our example, we have simply used a
Stretched Canvas has been converted. Of course you can also take an embroidery frame and later stretch the picture into a suitable picture frame. For our picture we took one Stretched Canvas and removed the canvas. The strips of the stretcher frame make a great Embroidery hoop frame and later the frame to which the Punch Needle picture is fixed. Since the canvas is coated, it is unfortunately not suitable for the Punch Needle embroidery technique.
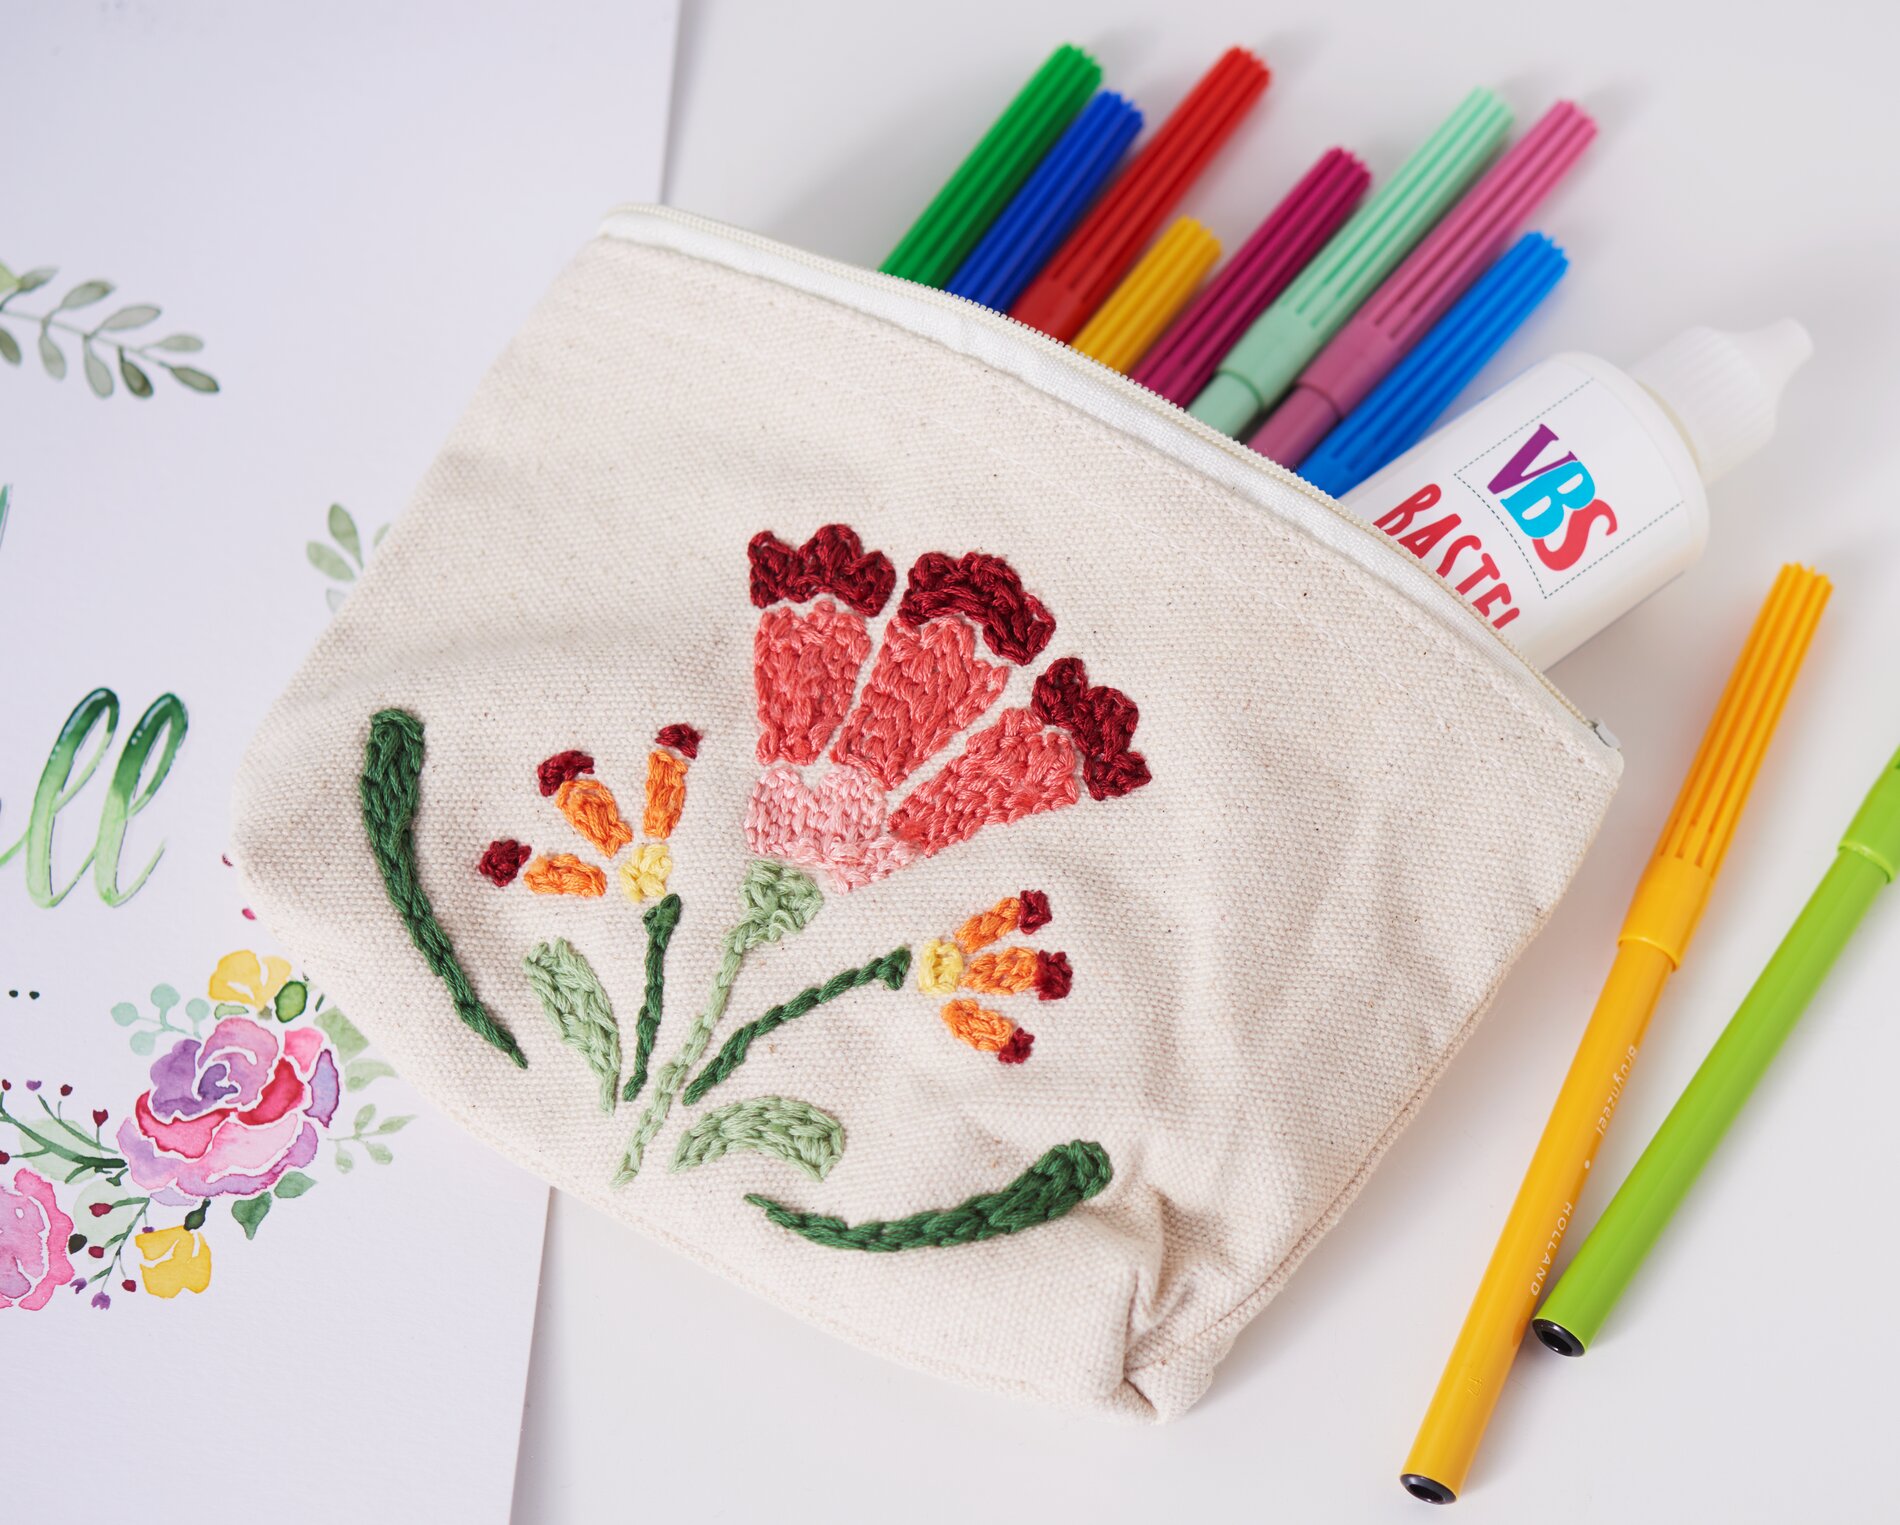
For the Punch Needle embroidery design, choose the wool
and colors you want to use.
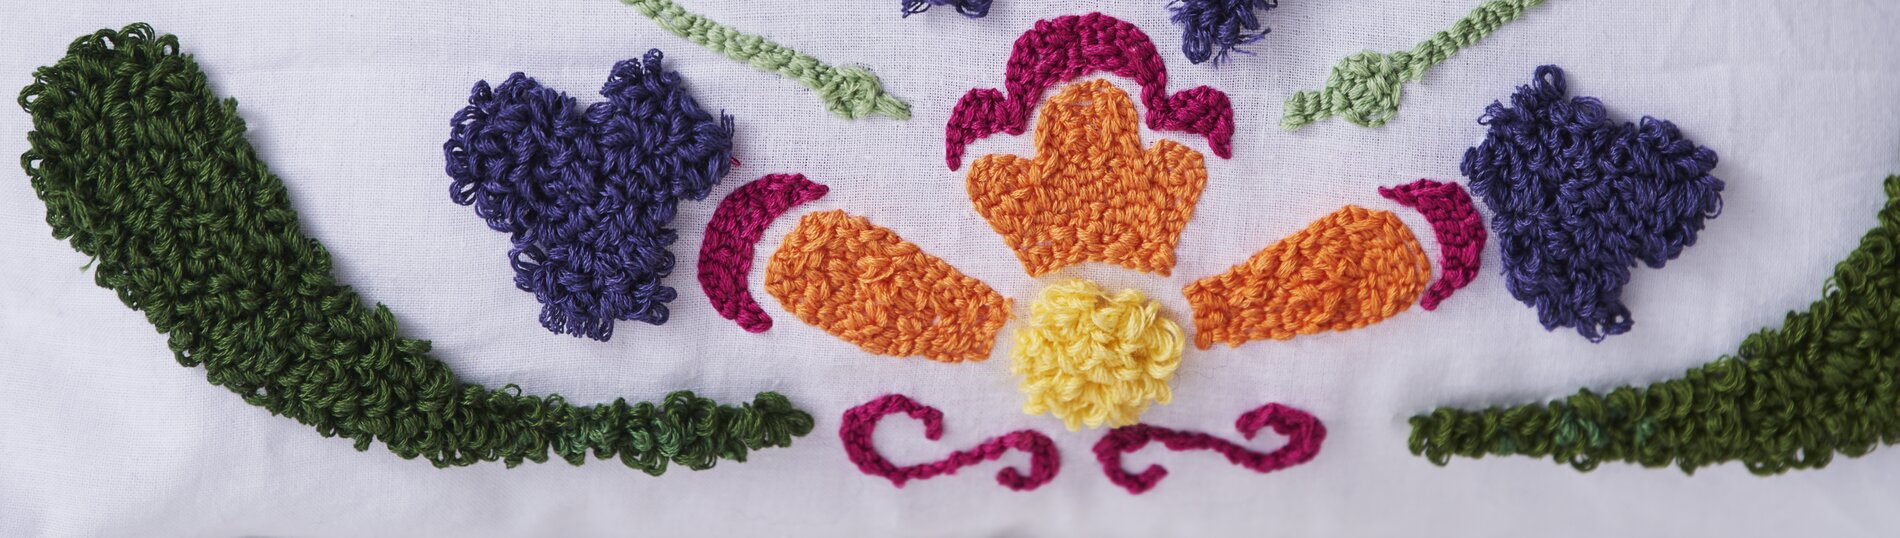
Decorative embroidery in 3D look is done by creating loops of different lengths, which are generated by the Punch Needle. The length of the loops can be adjusted on the needle itself. Thread the wool into your punch needle according to the instructions. Make sure that the thickness of the needle and the wool is correct. Now you can stitch your motif. The needle must always be completely pierced and the needle opening must point in the working direction. Work closely over the fabric and proceed slowly.
You can achieve beautiful effects with colour transitions or different wool thicknesses.
When you are finished, glue the backside with
Textile glue so the wool won't come off.
If you have worked with one Embroidery hoop , place your finished work on it Stretched Canvas and cut it to fit. Finally, staple it to the back of the frame.