- Secure order
- Easy return shipment
- Service-Hotline +31 20 809 5778
Instructions No. 3415
Difficulty: Beginner
Working time: 4 Hours
Make a lucky pig
Enter the creative world of crafting and let your imagination run wild! These instructions will help you to make adorable glittery lucky pigs - perfect little lucky charms that are suitable for small present or as New Year's greetings! Give the gift of a little joy and glitter and put a smile on people's faces.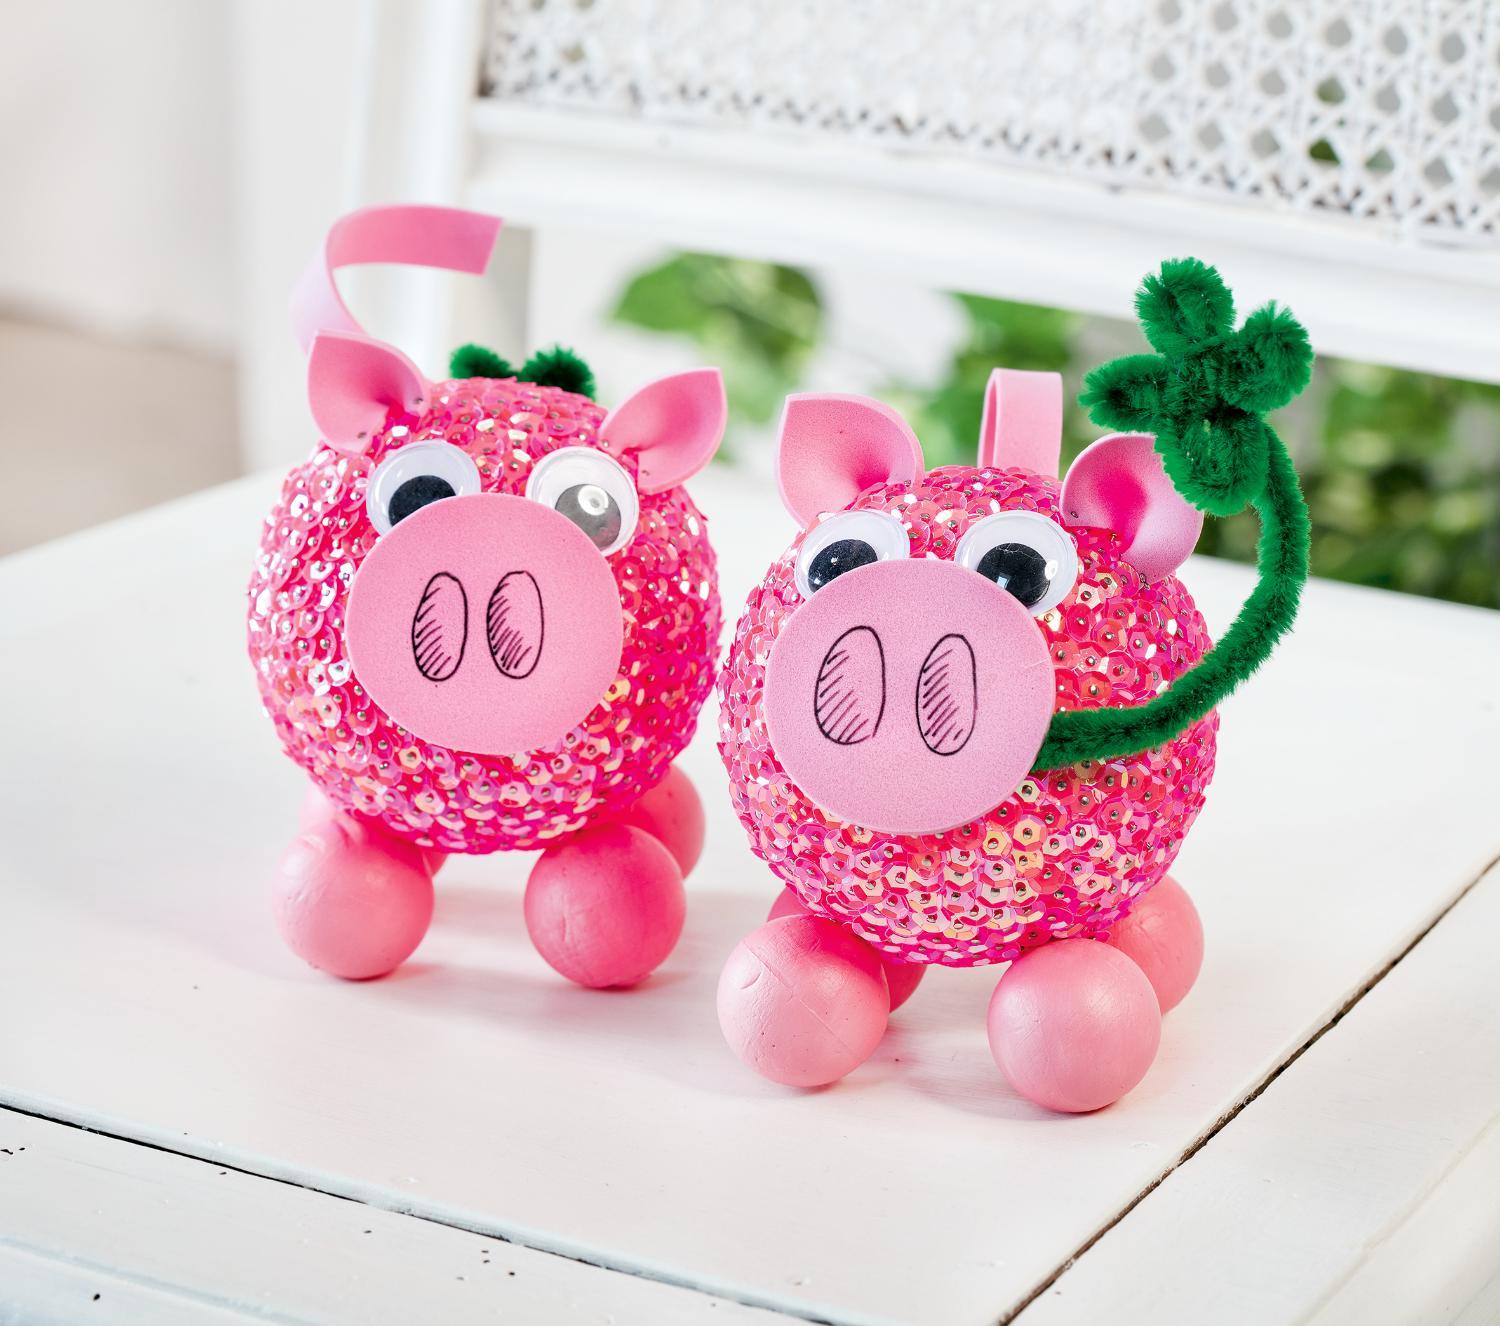
Why make lucky pigs?
The cute little pigs are not only a great craft project, but also symbolize luck and prosperity in the new year. These little cabinet pieces make a wonderful gift for friends and family and will liven up any festive decoration. Let's share this delightful fun together!
Step-by-step instructions for glitter pigs
Step 1: Prime the balls
Prime all polystyrene balls with the pink acrylic paint and allow the paint to dry thoroughly. This creates the base for your glittering lucky symbols.
Step 2: Cut the body parts out of
Choose pink foam sheets and cut the body parts out of it: Make a circular snout and draw the nostrils with a fineliners . Also cut out small pig ears - make sure they are not too small so that they can be bent. For the curly tail, simply cut out a narrow strip of foam rubber. There are no templates for the individual parts. Instead, play with the sizes of the body parts and decide on the shapes and dimensions yourself. This will give the pigs different character traits. Also choose different sizes for the wobbly eyes . If you make several pigs at once, each one will have its own personality.
Step 3: Create the shamrock
Shape green chenille wire shamrocks. These little lucky charms add a creative finishing touch to your piggies.
Step 4: Stick sequins
Now stick the iridescent pink sequins onto the large polystyrene ball. using pins . This gives the piggy an enchanting glitter effect.
Step 5: Put everything together
Bring your piggy to life by attaching the cut-out parts. Attach the ears with two pins, so that they hold perfectly. Attach the tail in the same way. Use the following for the hooves, eyes, snout and cloverleaf handicraft glue.
Your glittery lucky pigs are ready to go!
Have fun making them!
Put a smile on the faces of those around you by creating these funny and enchanting lucky pigs.