Easy Watercolour
Anleitung No. 2147Watercolour painting for beginners - in this tutorial we show you three ideas that you can easily copy.
Create a nautical card
1. Apply colour to the watercolour paper with a brush pen.2. Then use a water tank brush to watercolour the colour. The water makes the colour start to flow and creates dreamlike effects. Alternatively, use a brush to spread water on the paint and watercolour.
3. Punch out circles from coloured paper and watercolour paper.
4. Design the punched out circles with watercolour paint as well.
5. Once dry, stick the circles onto the paper using 3D adhesive pads and double-sided adhesive tape. This creates a multi-layered look.
6. Attach an embellishment like our boat to the paper.
7. Cut a card from photo cardboard and fold it in the middle.
8. Cut your designed watercolour paper and stick it on with double-sided tape.
Maritime painting with sea creatures
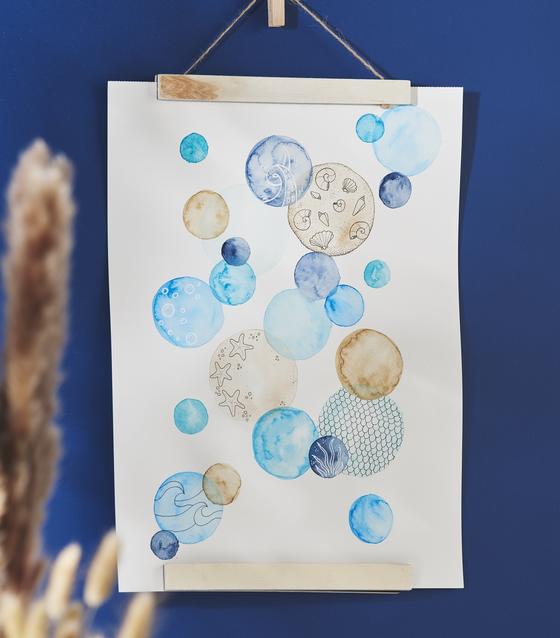
1. Draw circles of different sizes on the watercolour paper with a pencil. The circles may also overlap.
2. Colour the circles in matching shades. It is important that you start with the lighter shades and get darker from layer to layer. If you have painted overlapping circles, you should only paint one at a time and then let the paint dry. Otherwise the colours may run into each other.
3. Some circles can be completed with maritime doodles using fineliners and a white gel roller. In our example, we have painted on shells, waves, starfish, seaweed, bubbles, a tentacle and scales.