- Secure order
- Easy return shipment
- Service-Hotline +31 20 809 5778
Instructions No. 3465
Difficulty: Beginner
Working time: 4 Hours

Start your creative project by filling the storage jar with soy wax. Then pour the wax into a melting pot and heat it until it is completely melted. Soy wax is known for its clean and slow burn time, which makes it ideal for candles. Make sure that the wax melts evenly and that no lumps are visible.
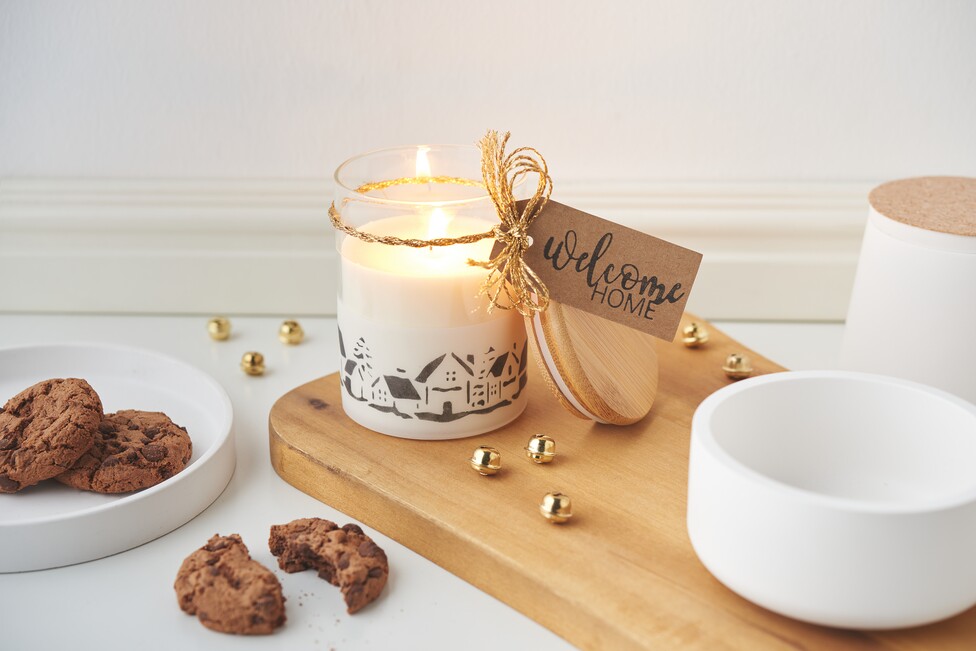
2. Position the wickPlace the wick in the jar into which you want to pour the melted wax later. To ensure that the wick does not slip when filling, you can hold it in place with a wick holder. A stable wick is crucial for your candle to burn evenly.
3. Add fragranceNow add a few drops of your favorite candle fragrance oil to the melted wax. Make sure that you stir the oil well so that the fragrance is evenly distributed throughout the wax. This will allow the pleasant fragrance to come into its own in your room.
4. Pour in the waxCarefully and slowly pour the melted wax into the prepared jars. Make sure that the wick remains centered. Allow the wax to cool completely and solidify. This cooling process also gives you time to move on to the next creative step.
5. vellum paper decorateWhile the wax is cooling, cut out a strip of vellum paper that is 28 cm long and 4.5 cm wide. Place a stencil with your desired motif on it. Use a dabbing brush by pressing it into a ink pads and going over the motif in dabbing movements until it is completely covered. Carefully remove the stencil and allow the paint to dry.
6. Design the gift tagChoose a suitable gift tag and stamp. Place the silicone stamp on an acrylic block that is suitable in size. Press the stamp into a ink pads, until it is evenly covered with paint. transfer the design by pressing the stamp onto the tag. After stamping, it is important to clean the silicone stamps and acrylic blocks with clear water to ensure their longevity.
7. cord bindingCut two pieces of cord to the desired length and twist them together. Fold the cord in the middle so that it automatically twists together again. Tie the cord around the candle, thread on the gift tag and form a bow.
8. Attach the motifWrap the vellum paper with the decorated house motif around the bottom of the candle and glue it carefully at the back.
9. Shorten the wickCut the wick to the desired length to ensure the candle burns safely. Done!


