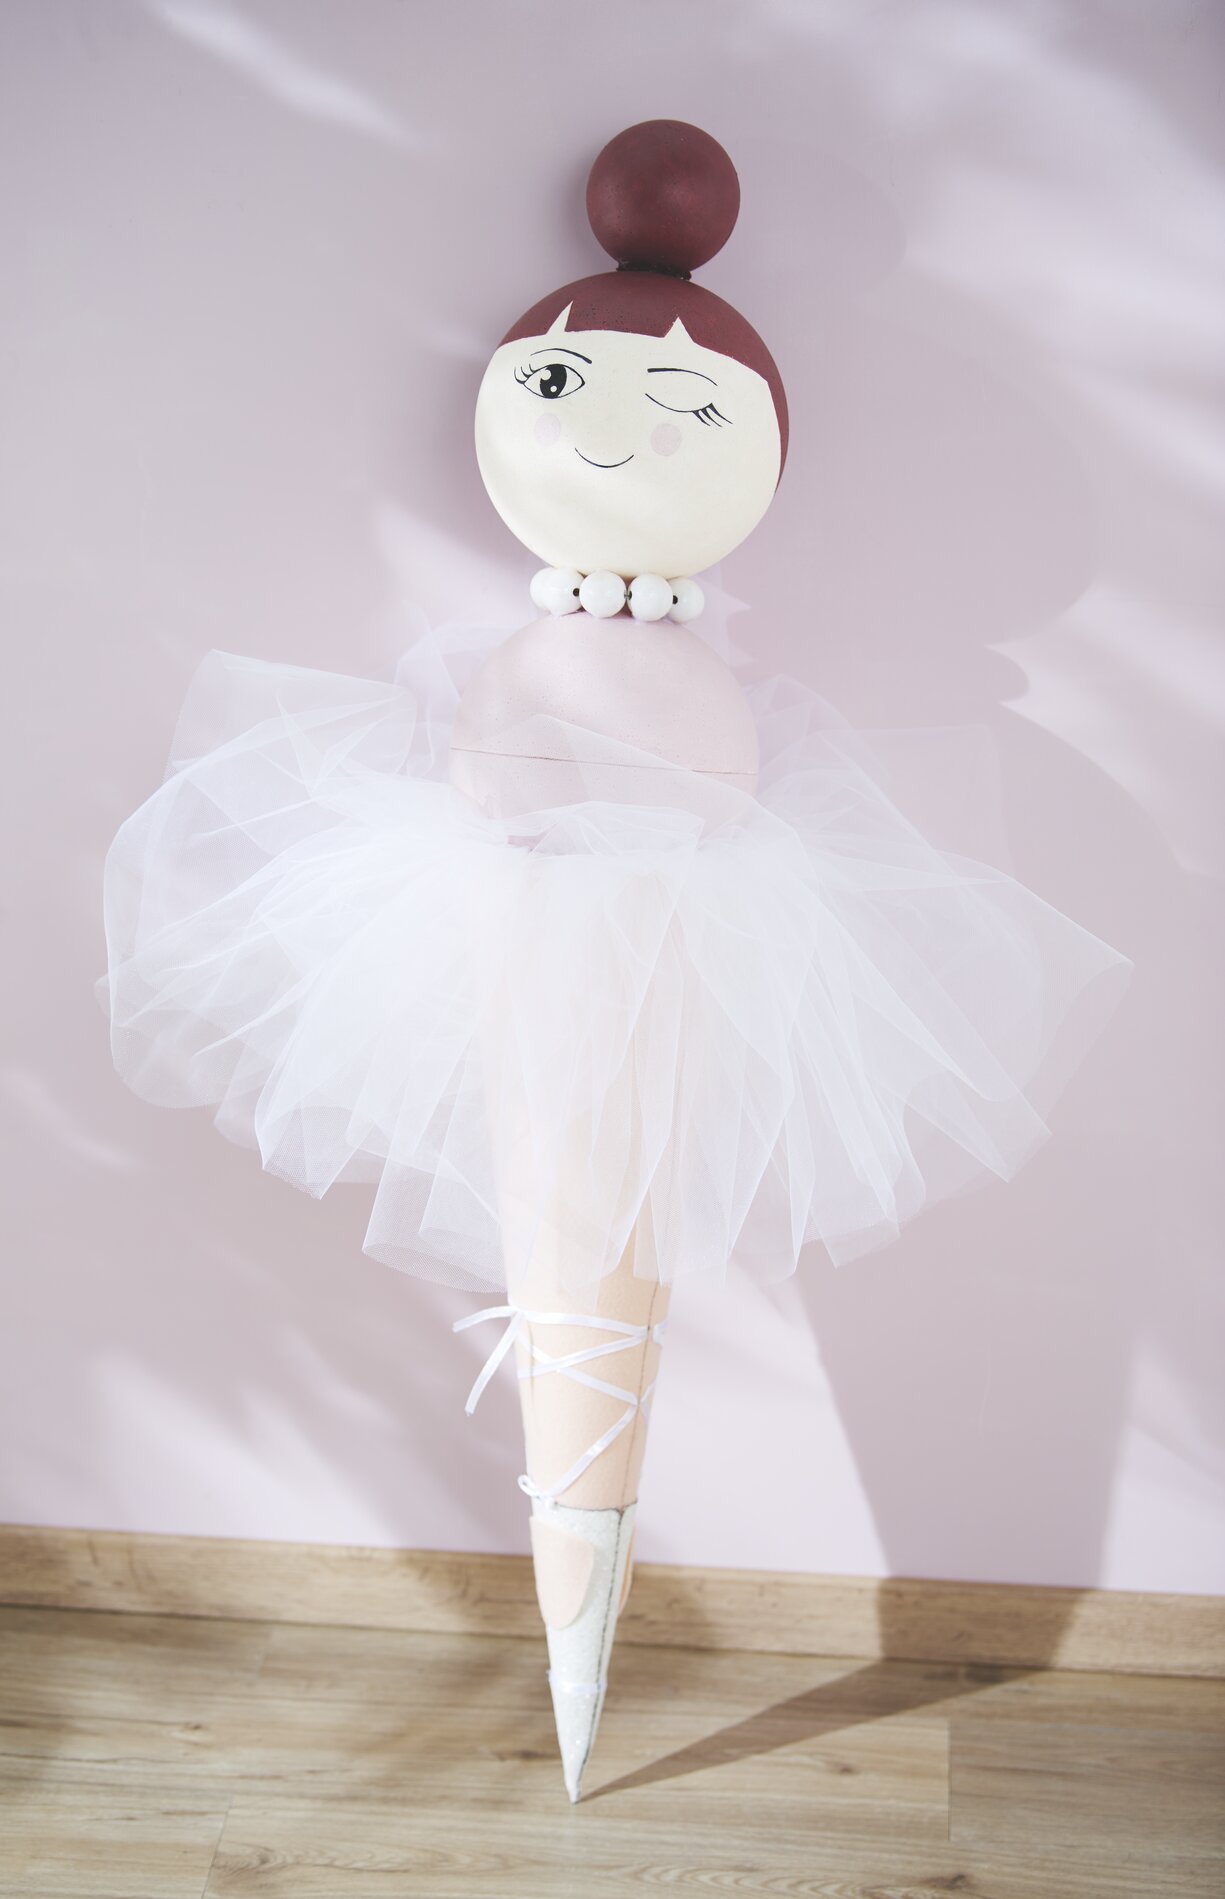
This is how you make the dancer:
Glue the school bag blank with and Adhesive tape Handicraft glue together.
Design the head and upper body of the ballerina. For this you paint a 20 cm ball in beige Handicraft paint. The other 20 cm ball representing the upper part of the body is painted with rosé. A 10 cm Handicraft paint. ball is painted in the colour of the chignon and the hair is painted in the same colour on the ball representing the head. We have chosen reddish brown Handicraft paint . Of course you can also use other colours if you want the dress, the hair or the face colour to have a different colour. Contours and the face are painted with a Marker recorded
For the Chain we have the Wooden balls painted Handicraft paint with white and glittering paint and mounted on winding wire. Now glue the torso, head and bun together with hot glue and attach them.
Glue the blank school bag with the felt. Leave the lower ones about 22 cm free. Glue the glitterRibbon onto these. Cut out Felt two parts for the feet and stick them with hot glue on the side of the glitter tape. This is how the open ballerinashoes should be represented. For the lacings on the legs, attach satin ribbons and fix them with hot glue if necessary.